 Breathe & Relax


User guide
How to use Breathe & Relax
Everything you need to start: five practices, meditations, statistics and settings — step by step, exactly as in the app.
01
Getting started
Install the app, open it — and you are one tap away from your first breath.
Download and open
Get Breathe & Relax from the App Store. No account or registration — the app works fully offline.
Tabs at the bottom
Every practice has its own tab: Simple Rhythm, Personal Rhythm, Anuloma Viloma, Hyperventilation, Meditations, Statistics and Settings.
The “i” button
On each practice screen, tap the “i” icon in the corner — it opens short instructions and a detailed description of the practice.
Free and Premium
Simple Rhythm and the music meditations are free. Premium unlocks Personal Rhythm, Anuloma Viloma, Hyperventilation and Yoga Nidra — with a 3-day free trial. Manage it in Settings → Subscription.
Voice in your language
The voice guides every phase — “inhale”, “hold”, “exhale” — in 11 languages. Change it in Settings → Language.


02
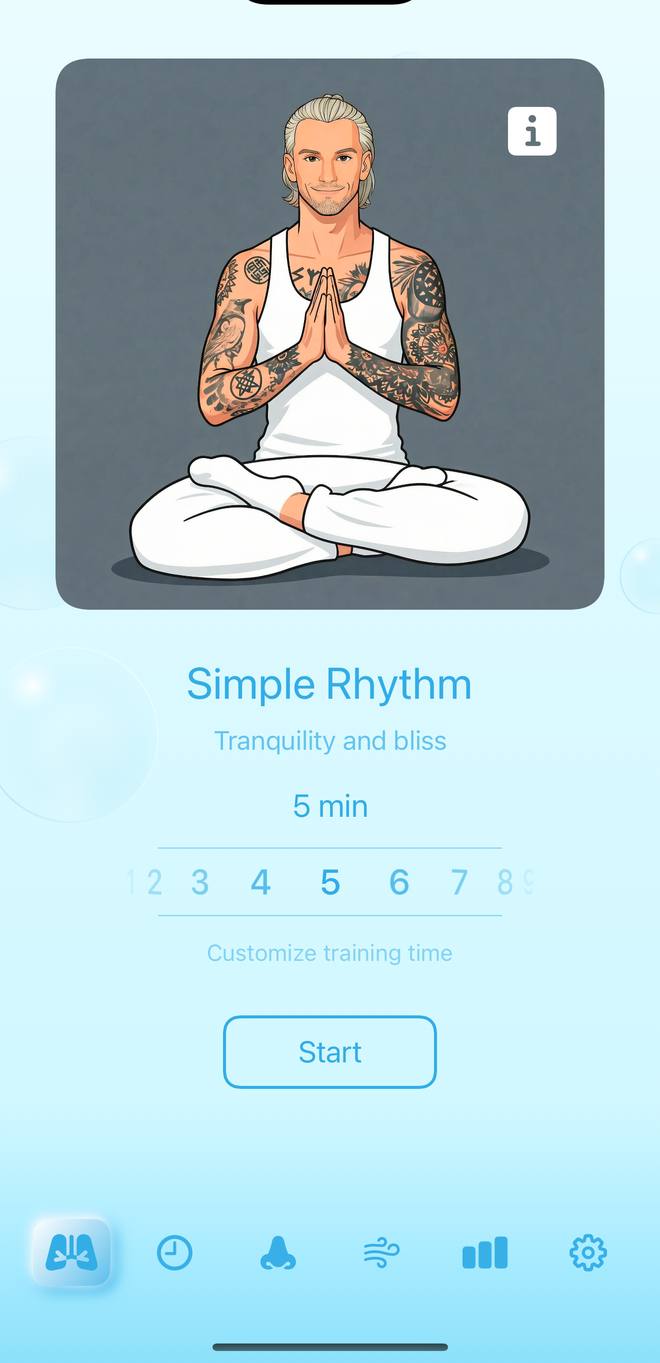
Simple RhythmFree
This practice is ideal for beginners.
How to use:
1. Select the desired number of minutes before starting.
2. Tap "Start".
3. Follow the breathing rhythm: inhale and exhale evenly.
4. Use the "+" and "-" buttons to adjust the breathing speed during the session.
Available speeds: 3, 4, 5, 7, 9 seconds for inhale and exhale.
Inhale as the lotus opens, exhale as it closes. A few minutes a day brings calm and focus.
03
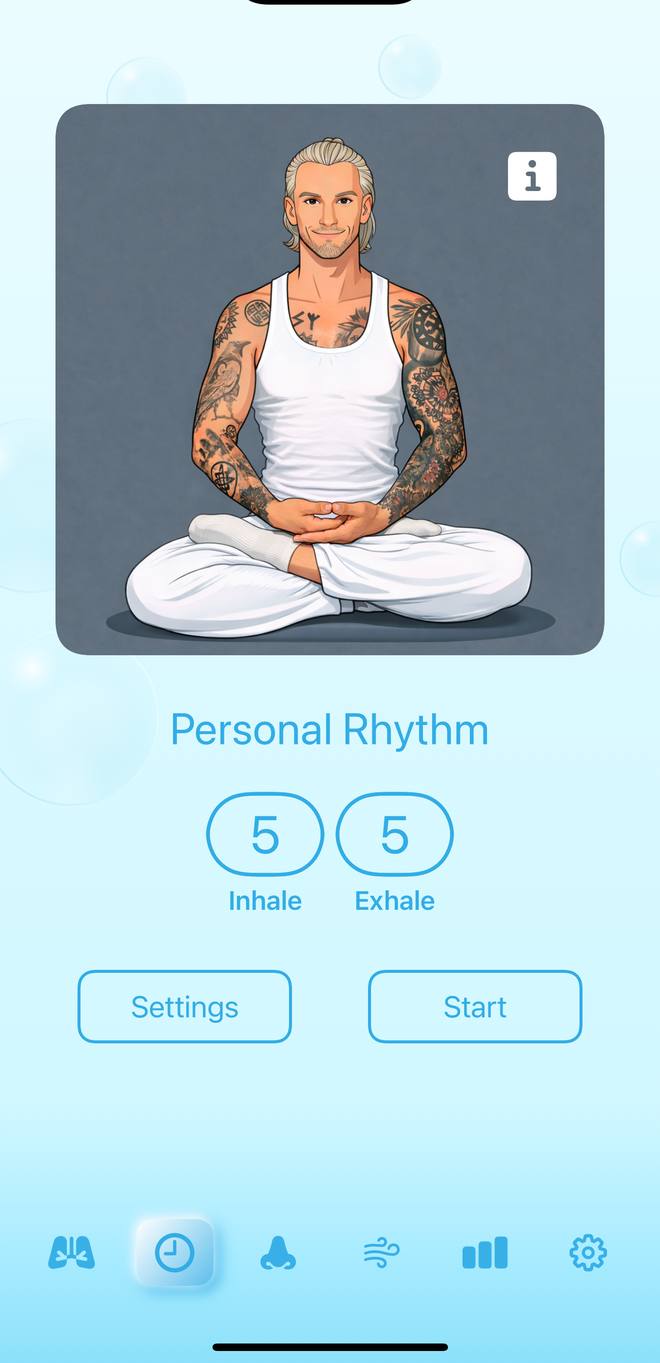
Personal RhythmPremium
This practice allows you to set your own breathing rhythm. You can adjust the duration of inhaling, exhaling, and breath holds to suit your needs and experience level.
Tap the "Configure" button.
1. Set the duration of each stage. You can configure inhale, exhale, and holds in seconds.
2. Set the cycle count.
3. If you want, enable meditation after the practice. To do this, choose its duration in minutes in Settings.
4. Tap "Save" and start the practice.
One cycle = inhale + exhale.
Detailed practice description
Preparation
1. Choose a comfortable place
Find a quiet and calm space where you won't be disturbed.
2. Assume a comfortable posture
Sit with a straight back. You may use any comfortable posture, for example:
- Simply sit in a chair - Sukhasana (cross-legged pose) - Siddhasana - Vajrasana
3. Set up your breathing
Relax your shoulders and close your eyes. Before starting, configure your rhythm.
4. Listen to my voice
During the practice, I will guide you through each stage. Follow my instructions and focus on your breathing.
Completing the Practice
5. Gradual return
When you finish several cycles, slowly return to normal breathing. Open your eyes when you are ready.
6. Assess your feelings
Allow yourself some time to notice the changes in your body and mind after the practice.
Conclusion:
Regular breathing rhythm practice improves concentration, reduces stress, and helps maintain a calm, balanced state. Wishing you a productive practice!

04
Anuloma VilomaPremium
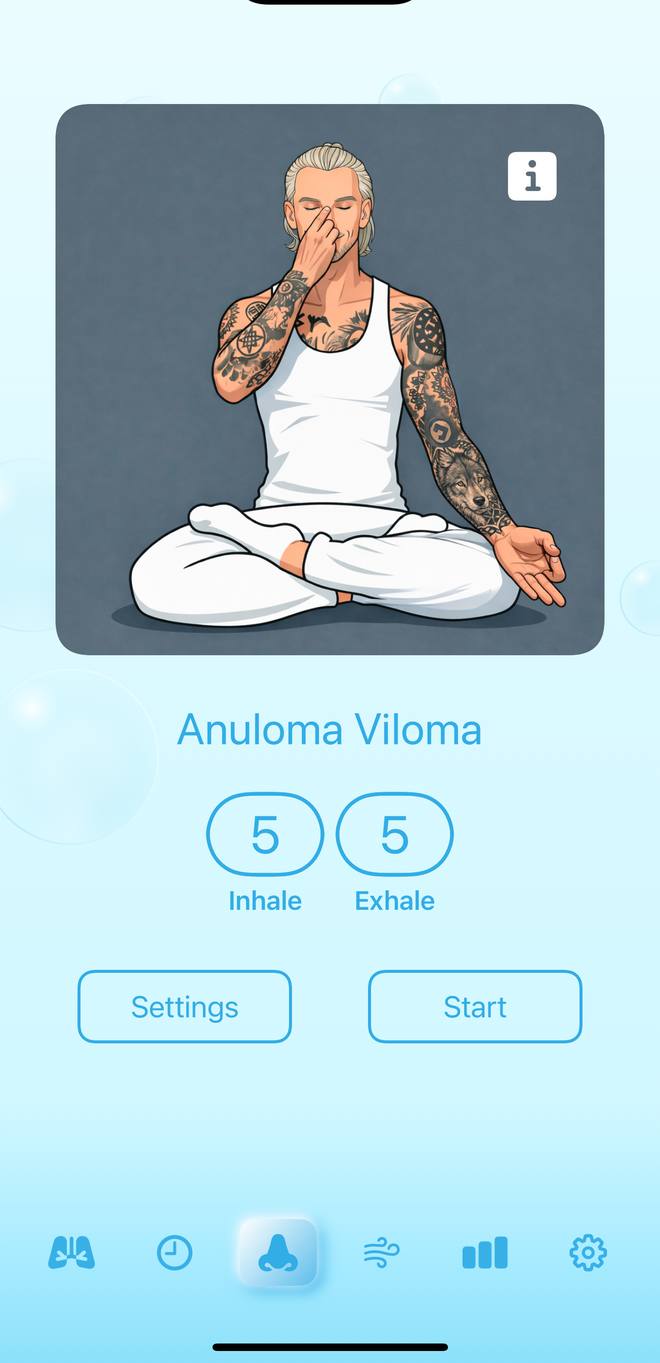
This Anuloma Viloma breathing technique will help you achieve relaxation and harmony. Please follow these steps.
Tap the "Configure" button.
1. Set the duration of each stage. You can configure inhale, exhale, and holds in seconds.
2. Set the cycle count.
3. If you want, set a meditation timer for after practice. Select the timer duration in minutes in Settings.
4. Tap "Save" and start the practice.
One cycle = inhale through left nostril, exhale through right, inhale through right, exhale through left.
After the breathing part, you can smoothly transition into meditation. Open settings, enable the post-practice meditation option, and set the desired duration in minutes.
Detailed practice description
Preparation
1. Choose a comfortable place
Find a quiet and calm space where you won't be disturbed.
2. Assume a comfortable posture
Sit with a straight back. You may use any comfortable posture, for example:
- Simply sit in a chair - Sukhasana (cross-legged pose) - Siddhasana - Vajrasana
3. Set up your breathing
Relax your shoulders and close your eyes. Before starting, configure your rhythm in the app by selecting the number of seconds for inhaling, exhaling, and holds.
Technique
4. Hand position
- Place the index and middle fingers of your right hand on the space between the eyebrows. - Close the right nostril with your thumb. - Place the ring finger and pinky near the left nostril.
5. Breathing cycle
Follow these steps for one complete cycle: - Inhale through the left nostril, keeping the right one closed. - Exhale through the right nostril, closing the left with ring finger and pinky. - Inhale through the right nostril, keeping the left one closed. - Exhale through the left nostril, closing the right with the thumb.
6. Listen to my voice
During the practice, I will guide you through each stage. Follow my instructions and focus on your breathing.
Completing the Practice
7. Gradual return
When you finish several cycles, slowly return to normal breathing. Open your eyes when you are ready.
8. Assess your feelings
Allow yourself some time to notice the changes in your body and mind after the practice.
Conclusion:
Regular Anuloma Viloma practice improves concentration, reduces stress, and harmonizes the brain hemispheres. Wishing you a productive practice!
05
HyperventilationPremium
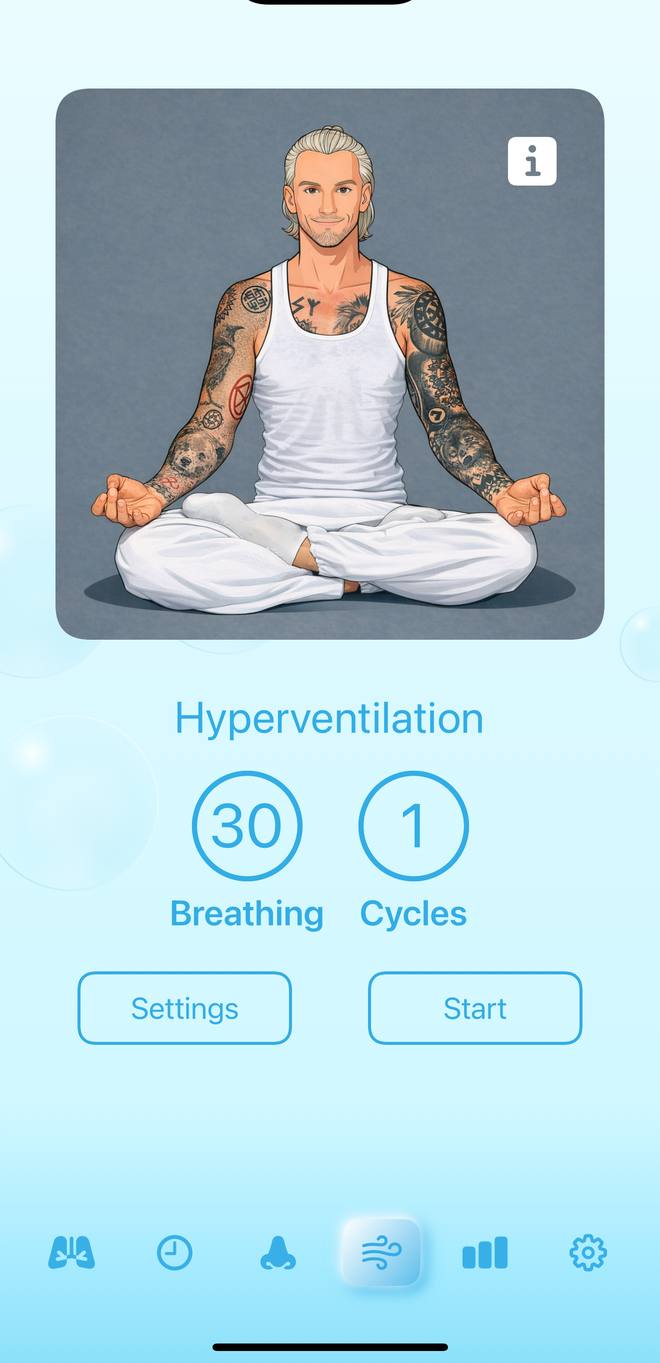
This breathing practice is based on intensive breathing followed by breath holds. It helps improve stress resilience, strengthen immunity, and boost energy levels.
Tap the "Configure" button.
1. Set breath count for one active breathing session.
2. Set breath tempo (in seconds): fastest is 2 sec, slowest is 5 sec.
3. After the breathing session, hold on exhale (exhale — hold breath) and hold on inhale (deep inhale — hold breath). Set the hold duration — this gives you a pause between sessions.
4. Set the number of cycles.
5. Tap "Save" and start the practice.
One cycle = active breaths + hold on exhale + hold on inhale.
Phase transitions are announced by sound signals.
Detailed practice description
Practice
1. Preparation
• Find a quiet, calm place • Assume a comfortable lying position • Make sure nothing will disturb you • Disable notifications
2. Practice execution
• Perform deep active breaths for the selected breath count • After active breathing, exhale and hold your breath for the selected exhale-hold time • Then inhale and hold your breath for the selected inhale-hold time • Audio cues announce each phase transition • Repeat this full cycle for the selected number of cycles
Recommendations
• Start with moderate settings • Gradually increase intensity • Listen to your body • Stop if you feel discomfort
Contraindications
Consult a doctor before starting if you have: • Cardiovascular diseases (arrhythmia, heart failure, coronary artery disease) • High blood pressure • Epilepsy or seizure disorders • Pregnancy • Respiratory diseases (severe asthma, COPD) • Glaucoma or retinal detachment • Mental health conditions (panic disorder, schizophrenia, bipolar disorder) • Recent surgery or serious injuries • History of stroke Never practice in water or while driving.
Conclusion:
Regular practice strengthens health, boosts vitality, and improves stress resilience. Start gradually and pay close attention to how you feel.
06
Yoga NidraPremium
Deep, conscious relaxation! This session will help you relax and restore inner balance. Please follow these simple steps.
Full voice guidance in English, Russian, German, Japanese and Korean. In other languages the Meditations tab offers music meditations.
How to use:
1. Open the Meditations tab and choose Yoga Nidra.
2. Lie down comfortably, put on headphones if you like, and tap Start.
3. Set the volume so the voice is soft and clear. Then just listen.
Detailed practice description
Preparation
1. Choose a comfortable place
Find a quiet and calm place where you won't be disturbed. It can be any space where you feel comfortable.
2. Assume a comfortable posture
Settle into a comfortable position: - Lying on your back with arms and legs extended. - Semi-reclined on a sofa or armchair. - Sitting in a comfortable chair with back support.
3. Tune in to the practice
Make sure you're comfortable. Close your eyes and take a few deep breaths. Allow your body to relax.
Starting Relaxation
4. Listen to my voice
When you're ready, start listening to my voice. I will guide you through the relaxation.
5. Body relaxation
I will name different body parts. With each mention, focus on that area and allow it to fill with lightness, pleasant warmth, and relaxation.
Completing the Practice
6. Assess your feelings
When I finish guiding you, slowly begin to return to the present. Take a few deep breaths, stretch, and open your eyes when you're ready.
7. Assess your feelings
Allow yourself some time to notice your feelings after the practice. Pay attention to changes in your body and state of mind.
Conclusion
This practice will help you restore strength and harmony. Regular use of this technique can improve your overall well-being and reduce stress levels. Wishing you a productive, pleasant practice!
07
MeditationsFree
Music for relaxation, focus and sleep — no voice, available in every language. Press play, set the volume and close your eyes.
08
Statistics
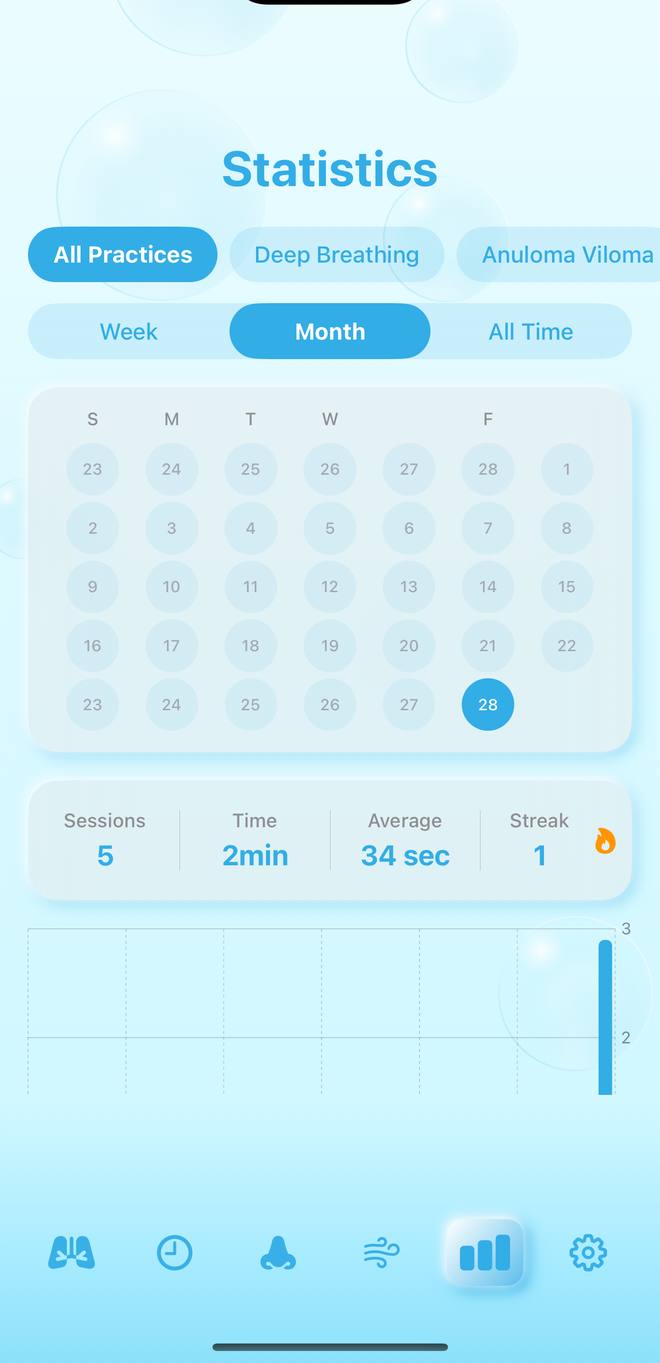
Every completed session is saved automatically. Watch your streak grow.
Filters
Show all practices or a single one, and pick the period: Week, Month or All Time.
Your numbers
Sessions, total time, average session length and the streak — days in a row.
Calendar and chart
Days with practice light up in the calendar, the chart shows minutes per day, and below is the history of every session.
Apple Health
Turn on Settings → Apple Health → Sync with Apple Health. Each session is saved as Mindful Minutes. Use “Export past sessions” to send your existing history.
Saved sessions appear in Apple Health → Browse → Mindfulness as Mindful Minutes.
09
App Settings
Everything lives in the Settings tab — the gear icon at the bottom.
Practice Settings
- Voice GuidanceVoice cues for breathing phases
- MetronomeTick sound on each second
- Metronome Volume
- VibrationVibrate on phase change
Reminders
Daily practice reminders
- Enable Reminders
- Reminder Time
- Repeat DaysEvery Day · Weekdays · Weekends
Language
11 languages or System. The interface and the voice switch together.
Apple Health
- Sync with Apple HealthSave each breathing session to Apple Health
- Export past sessionsSend your existing practice history to Apple Health
Subscription
Premium status, restoring purchases and managing the subscription.
- Restore Purchases
- Manage Subscription
Information
Descriptions of all practices — the same texts as in this guide.
10
Safety
Breathing practices are gentle, but intense techniques like Hyperventilation have contraindications.
Contraindications
Consult a doctor before starting if you have: • Cardiovascular diseases (arrhythmia, heart failure, coronary artery disease) • High blood pressure • Epilepsy or seizure disorders • Pregnancy • Respiratory diseases (severe asthma, COPD) • Glaucoma or retinal detachment • Mental health conditions (panic disorder, schizophrenia, bipolar disorder) • Recent surgery or serious injuries • History of stroke Never practice in water or while driving.
If you feel dizzy or uncomfortable — stop, breathe normally and rest.
11
Video guides
Short videos for every practice are coming soon.
Take a breath.
Breathe & Relax — on the App Store. Your first calm exhale is a minute away.
Download on the App Store